This short tutorial discusses use of the Standard Cell layout service implemented via Mentor AutoCells. This service can produce either a standard cell layout in either Mentor '.L' format or GDSII from an EDIF netlist containing cells from the MSU SCMOS/GCMOS standard cell libraries. The service is setup to only work with only EDIF netlists using either the MSU SCMOS or MSU GCMOS libraries.
Much of the power of the Mentor AutoCells environment is NOT exposed via this GUI; the intended use of this GUI is for routine, quick layout experiments.
You will need the following input file(s) for this tutorial:
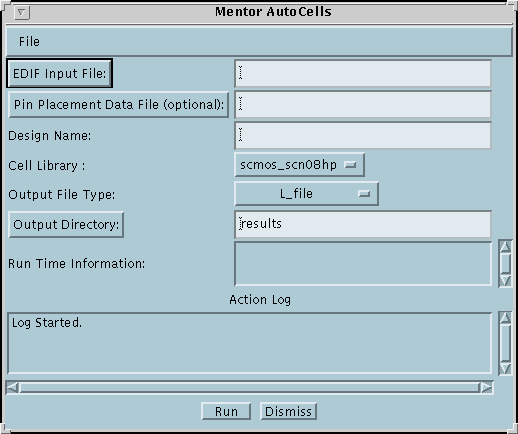
The main window for the standard cell layout service is shown
below:
The various fields in the service window must be filled in before a job can be submitted to the server. The fields are explained below.
Left clicking on the Input File button will pop up a file dialog box thru which you can specify your input file. Alternatively, you can use the typein field to specify the pathname to your file. The service only EDIF input files (and has only been tested with EDIF files from the Synopsys synthesis tool). The EDIF file needs to be a flattened netlist of cells from one of the MSU standard cell libraries.
This is an optional data file that allows the user to specify the edge (left, right, top, bottom) that a pin is be routed. The format of the file is simple; each line contains a pin name followed by a letter indicating the route-to edge (l - left,r - right,t - top,b - bottom). Look at this edif file (dec3to8_scmos.edif) and its associated pin placement file (dec3to8.data) for an example.
Use this typein field to specify the name of the edif cell entity in your input file (there should be only one 'cell' definition since this has to be a flattened netlist).
This choice menu needs to specify the MSU standard cell library that the EDIF input file uses. This also specifies the technology that the layout will be produced for.
Use this choice menu to specify what output file type (L or GDSII or both) is desired.
Left clicking on this button will pop up a dialog box thru which you can specify output directory. Alternatively, you can use the typein field to specify the pathname to your directory. The directory will be created if it does not exist; files which already exist in the directory will be overwritten upon completion of the job.
During job execution a status window will appear which will allow you to monitor the progress of the job execution. At this point there is no way for the user to interact with the job during execution (we want to add at least a 'kill' button in the near future).
When the job is complete, the directory specified in the 'output directory' will contain the results files of the synthesis run. A README file in this directory explains what each result file contains.
Run the standard cell layout service using the 'arbiter_scmos.edif' file referenced above as the input file. For any choices not specified, use the default choice. The other choices should be:
After the layout is finished, the 'results' directory should contain
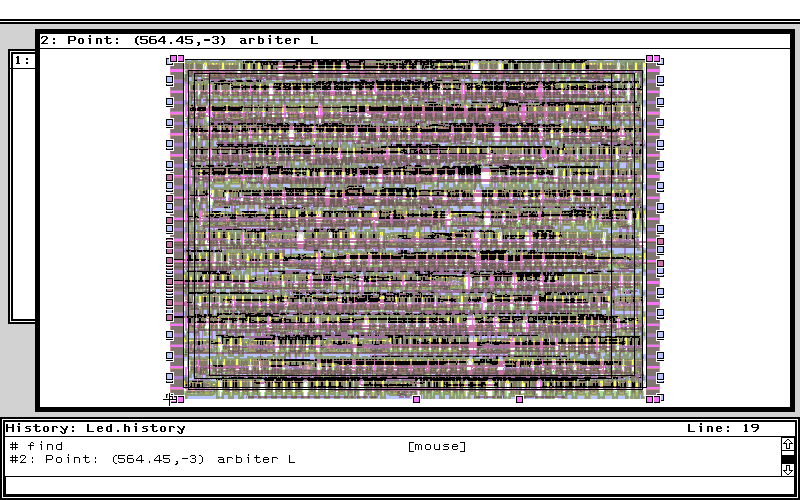
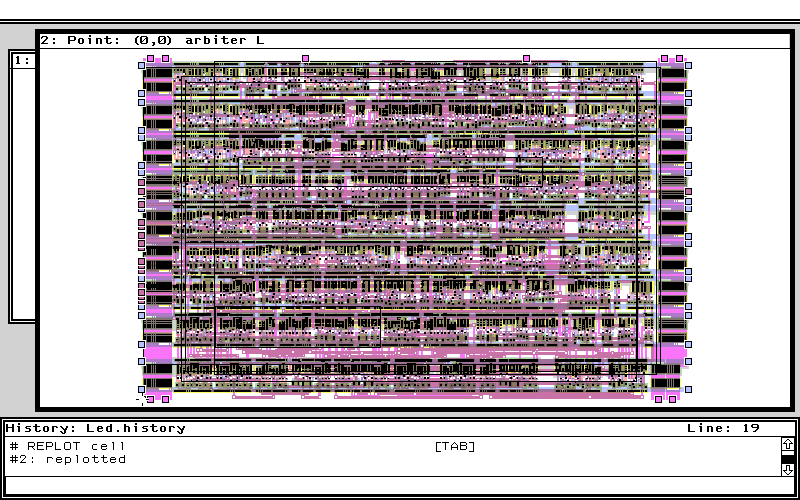
a file called 'arbiter.L'. A view of this layout in the Mentor Led
editor should look something like:
It is important to realize that you input file is transferred to the server before synthesis, and all result files are transferred back to your local output directory. If you are using a dialup link and are using large input/output files, then this transfer may take a long time.