
|
|
|
|
|
|
|
|||

Creating a Project
vsimfor Windows - your option - from a Windows shortcut icon, from the Start menu, or from a DOS prompt:
modelsim.exe
- Upon opening ModelSim for the first time, you will see a Welcome to ModelSim dialog box. (If this screen is not available, you can enable it by selecting Help > Enable Welcome from the Main window. It will then display the next time you start ModelSim.)
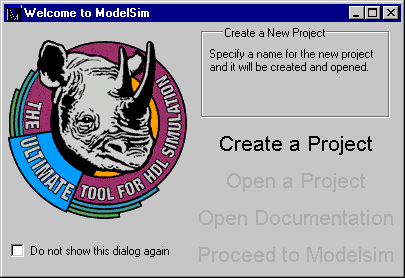
Select Create a Project from the Welcome to ModelSim dialog box. Or select File > New > Project from the ModelSim Main window.
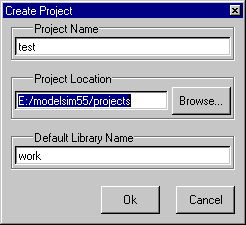
Selecting Create a Project opens the Create Project dialog box.
- In the Create Project dialog box, enter "test" as the Project Name and select a directory where the project file will be stored. Leave the Default Library Name set to "work."
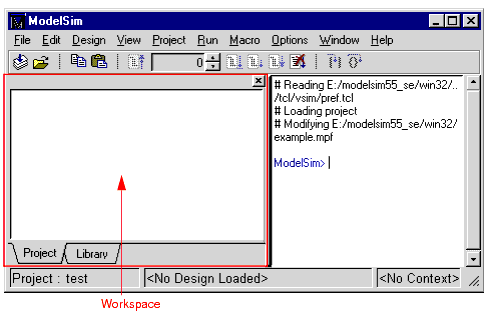
- Upon selecting OK, you'll see the Main window with Project and Library tabs. Notice too that the Project name is shown in the status bar below the Workspace.
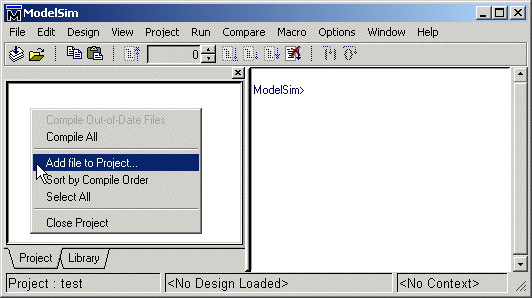
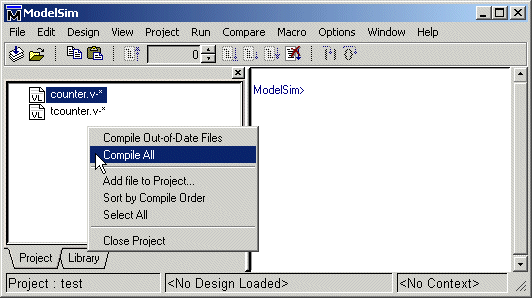
- The next step is to add the files that contain your design units. Click your right mouse button (2nd button in Windows; 3rd button in UNIX) in the Project page of the Workspace, and select Add File to Project.
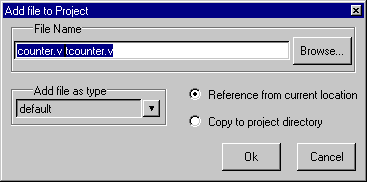
- For this exercise, we'll add two Verilog files. Click the Browse button in the Add file to Project dialog box and open the examples directory in your ModelSim installation. Select tcounter.v and counter.v. Select Reference from current location and then click OK.
- Right click in the Project page and select Compile All.
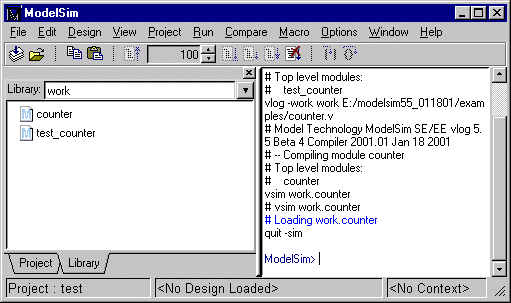
- The two files are compiled. Click on the Library tab and you'll see the compiled design units listed. If you don't see the design units, make sure the Library: field shows "work."
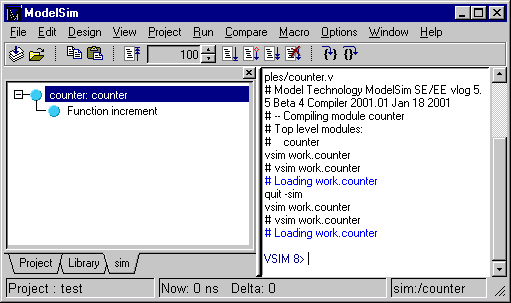
- The last step in this exercise is to load one of the design units. Double-click counter on the Designs page. You'll see a new page appear in the workspace that displays the structure of the counter design unit.
At this point, you would generally run the simulation and analyze or debug your design. We'll do just that in the upcoming lessons. For now, let's wrap up by ending the simulation and closing the project. Select Design > End Simulation and after confirming you want to quit simulating, select File > Close > Project.
|
Model Technology Incorporated Voice: (503) 641-1340 Fax: (503)526-5410 www.model.com sales@model.com |
|
|
|
|
|
|
|
|||