|
|
|
|
|
|
|
|||

Preparing the simulation
- Start by creating a new directory for this exercise (in case other users will be working with these lessons). Create the directory, then copy all of the VHDL (.vhd) files from \<install_dir>\modeltech\examples to the new directory.
Make sure the new directory is the current directory. Do this by invoking ModelSim from the new directory or by selecting the File > Change Directory command from the ModelSim Main window.
vsimfor Windows - your option - from a Windows shortcut icon, from the Start menu, or from a DOS prompt:
modelsim.exe
Select "Proceed to ModelSim" if the Welcome dialog appears.
- Before you compile any HDL code, you'll need a design library to hold the compilation results. To create a new design library, make this menu selection in the Main window: Design > Create a New Library.
Make sure Create: a new library and a logical mapping to it is selected. Type "work" in the Library Name field and then select OK.
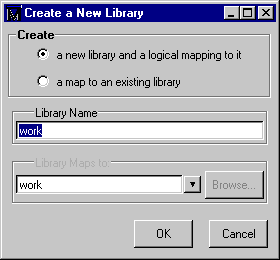
This creates a subdirectory named work - your design library - within the current directory. ModelSim saves a special file named _info in the subdirectory.
(PROMPT: vlib work
vmap work work)
- Compile the file counter.vhd into the new library by selecting the Compile button on the toolbar:

This opens the Compile HDL Source Files dialog box. (You won't see this dialog box if you invoke vcom from the command line.)
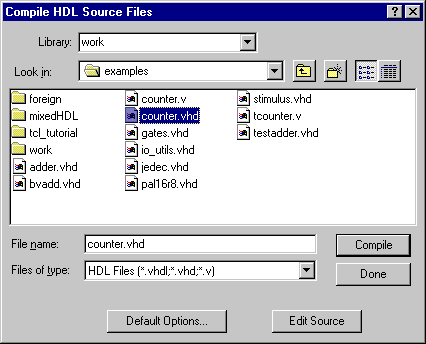
Complete the compilation by selecting counter.vhd from the file list and clicking Compile. Select Done when you are finished.
You can compile multiple files in one session from the file list. Individually select and Compile the files in the order required by your design.
- Now let's load the design unit. Select the Load Design button from the toolbar:

The Load Design dialog box comes up, as shown below (you won't see this dialog box if you invoke vsim with counter from the command line).
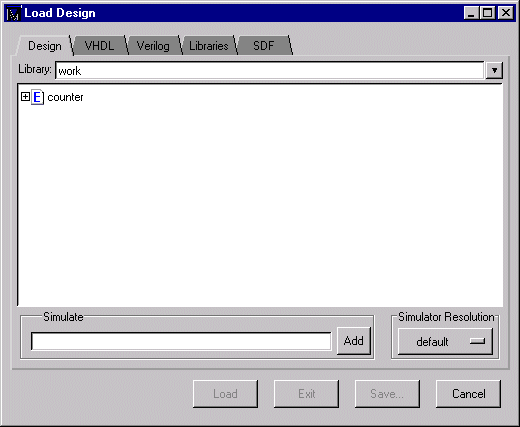
The Load Design dialog box lets you select the library and top-level design unit to simulate. You can also select the resolution limit for this simulation. By default, the following will appear for this simulation run:
- Simulator Resolution: default (the default is 1 ns)
- Library: work
- Design Unit: counter
If the Design Unit is an entity (like counter in this design), you can click on the plus-box prefix to view any associated architectures.

- Select the entity counter and choose Load to accept these settings.
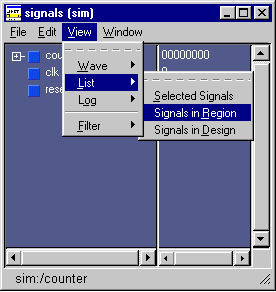
- Next, select View > All from the Main window menu to open all ModelSim windows.
For descriptions of the windows, consult the ModelSim User's Manual.
|
Model Technology Incorporated Voice: (503) 641-1340 Fax: (503)526-5410 www.model.com sales@model.com |
|
|
|
|
|
|
|
|||